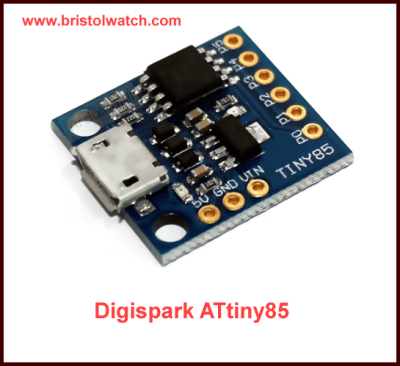
Digispark ATtiny85
Digispark ATtiny85 with MCP23016 GPIO Expander
This project connects a MCP23016 GPIO expander to a Digispark ATtiny85. Use the Arduino Nightly compiler and install the TinyWireM library. The original I2c on Arduino won't work.
See my YouTube video for this page: Digispark ATtiny85 with GPIO Expansion
Setup information from Digispark: How to connect ATtiny85.
I've kept a copy of the I2c TinyWireM library which is a zip file.
Support for the Arduino IDE 1.0+ (OSX/Win/Linux)
Power via USB or External Source
Onboard 5V Regulator
Built-in USB
6 I/O Pins
8k Flash Memory (about 6k after bootloader)
I2C and SPI (vis USI)
PWM on 3 pins (more possible with Software PWM)
ADC on 4 pins
Power LED and Test/Status LED
Pin outs: All pins can be used as Digital I/O
Pin 0 - I2C SDA, PWM
Pin 1 - PWM
Pin 2 - I2C SCK, Analog
Pin 3 - Analog In (also used for USB+ when USB is in use)
Pin 4 - PWM, Analog (also used for USB- when USB is in use)
Pin 5 - Analog In, default disabled, only for RESET You can
check MCUSR and program different behaviar for power-on and
reset button press PIN 0,1,2,GND,VCC are
available to insert into breadboard
// 102 bytes
void setup() {
  // initialize the digital pin as an output.
  DDRB = DDRB | 0b00000010; // 2 bytes
  PORTB = PORTB & 0b11111101;  // 2 bytes
}

void loop() {
  // toggle pin 1
  PORTB = PORTB ^ 0b00000010; // 8 bytes
  // delay
  for (int i = 0; i <= 500; i++)   {
    // 1000 uSec = 1 mS
    delayMicroseconds(1000); // 72 bytes
  } // for loop 18 bytes
}
The above sketch uses direct port access to save memory. It blinks the on board LED on PB1.
To better understand Arduino port register commands see Arduino Port Registers Revisited
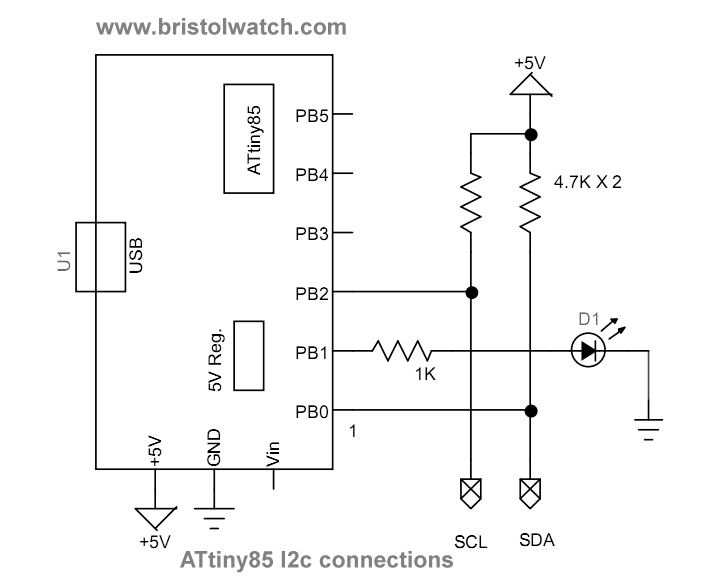
Digispark ATtiny85 I2C connections.
Also MCP23016 LEDs schematic. Also MCP23016 spec sheet.
/*
   Count binary port 0 MCP23016 with 8 LEDs
*/

#include <TinyWireM.h>

// MCP23016 Address
uint8_t MCP23016_add = 0x20;
// must use the uint8_t !
uint8_t i;

void setup() {

  TinyWireM.begin();
  TinyWireM.beginTransmission(MCP23016_add);
  TinyWireM.send(0x06);
  TinyWireM.send(0); // port 0 output
  TinyWireM.send(0xFF); // port 1 input
  TinyWireM.endTransmission();
  // setup PBO for output
  DDRB = DDRB | 0b00000010; // 2 bytes
}

void loop() {

  for (i; i <= 255; i++)   {
    TinyWireM.beginTransmission(MCP23016_add);
    TinyWireM.send(0x00);
    TinyWireM.send(i);
    TinyWireM.endTransmission();
    delay(200);

    PORTB = PORTB ^ 0b00000010; // 8 bytes
  }
}
See How I got into Electronics
- Arduino Port Registers Revisited
- Digispark ATtiny85 with MCP23016 GPIO Expander
- Safely Build Program a H-Bridge
- Build H-Bridge Motor Control Without Fireworks
- MOSFET H-Bridge for Arduino 2
- PICAXE Projects
- YouTube videos:
- Simple Power Distribution for Prototype Board
- Program Arduino Ports for Speed and Control
- Digispark ATtiny85 with GPIO Expansion
- Safely Program H-Bridge Motor Controller
- Build H-Bridge Motor Control without Fireworks
- MOSFET H-Bridge for Arduino 2
- Arduino Projects Revisited Revised
- Programming ADS1115 4-Channel I2C ADC with Arduino
- Arduino uses ADS1115 with TMP37 to Measure Temperature
- Connect Arduino to I2C Liquid Crystal Display
- Arduino Reads Temperature Sensor Displays Temperature on LCD Display
- Arduino with MCP4725 12-bit Digital-to-Analog Converter Demo
- Videos
- Arduino with ADS1115 4-Channel 16-bit Analog-to-Digital Converter
- Arduino with MCP4725 12-Bit DAC
- Constant Current Circuits with the LM334
- LM317 Constant Current Source Circuits
- Introduction Hall Effect Switches, Sensors, and Circuits
- Microchip PIC related videos:
- How to Use K150 PIC Programmer
- Microchip PIC16F628A Basic H-Bridge Motor Control
- Microchip PIC16F628A Counts BCD on 8 LEDs
- PIC16F84A Operates H-Bridge Motor Control
- PIC16F84A Operates MOSFET H-Bridge
- Using Velleman K8048 PIC Development Board
- Microchip PIC16F84A H-Bridge Motor Control
- Microchip PIC16F628A Basic H-Bridge Motor Control
- PICAXE Operates H-Bridge Motor Controller
- PICAXE Micorcontroller Controls Motor Speed - Direction
- PICAXE Projects
- Arduino Port Registers Revisited
- Digispark ATtiny85 with MCP23016 GPIO Expander
- Safely Build Program a H-Bridge
- Build H-Bridge Motor Control Without Fireworks
- MOSFET H-Bridge for Arduino 2
- Web Master
- Gen. Electronics
- YouTube Channel
- Arduino Projects
- Raspberry Pi & Linux
- PIC18F2550 in C
- PIC16F628A Assembly
- PICAXE Projects
Web site Copyright Lewis Loflin, All rights reserved.
If using this material on another site, please provide a link back to my site.